- Home
- Blog
Blog
On 02/09/2018

|
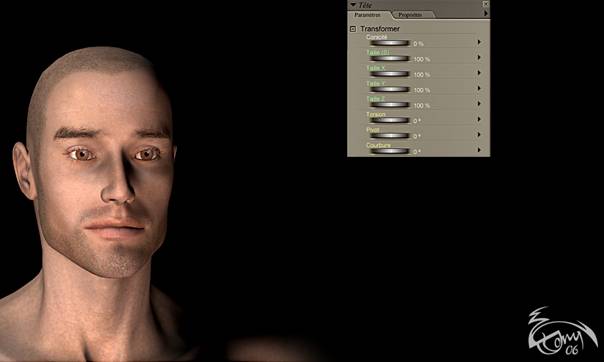
En partant d'une idée que m'a inspiré Tipol, voici comment réaliser, comme on dit, "une gueule" histoire de donner du caractère à vos modèles avant de lui donner vie... Pour cet exemple j'ai utilisé Michael 3.0 de base (chez Daz production), ainsi que Michael 3.0 Head & Body morphs... Avant de sculpter votre personnage, appliquer une texture de peau, c'est plus sympa pour voir la réaction des déformations...Il existe bien sur différentes textures (gratuites ou payantes) ou vous pouvez la réaliser vous meme...J'ai utilisé pour l'exemple : M3 Universal texture maps (j'ai juste rajouté des poils de barbe). Pour ma part je travaille avec des lumières réduites (3) , ce qui permet un maximum de contraste pour bien voir les plis ou autres crevasses que nous allons appliquer sur le visage... |
Changer les morphs et les expressions
On 02/09/2018
|
|
On 02/09/2018
|
Rajouter des personnages et des objets
On 02/09/2018
|
|
On 02/09/2018
|
|
On 02/09/2018
|
|
|
|
On 09/10/2017
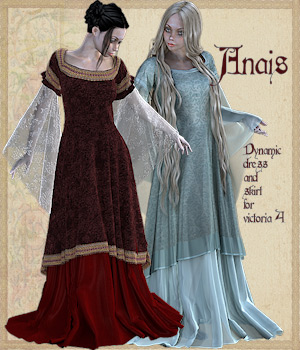
Dynamics Clothes
![]()
|
Here is a tutorial that will help you understand how to use clothes dynamics, including their superpositions.
|
|
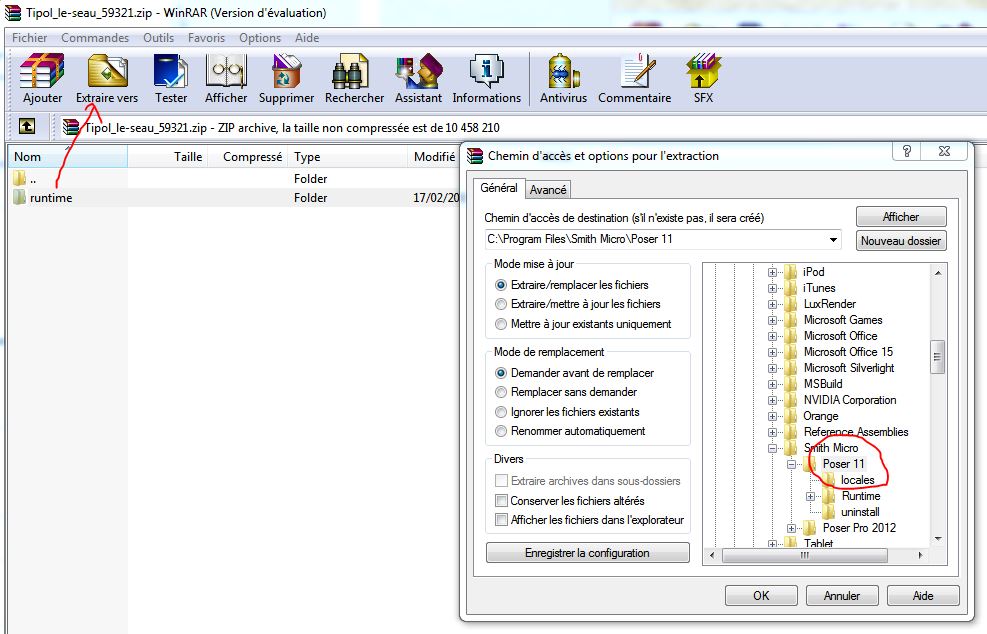
Here are the links to load the morph, hair and dynamic clothes used for this tutorial. Anais dynamic dress and skirtResplendent Tresses |
|
Click on screen captures to zoom the pictures
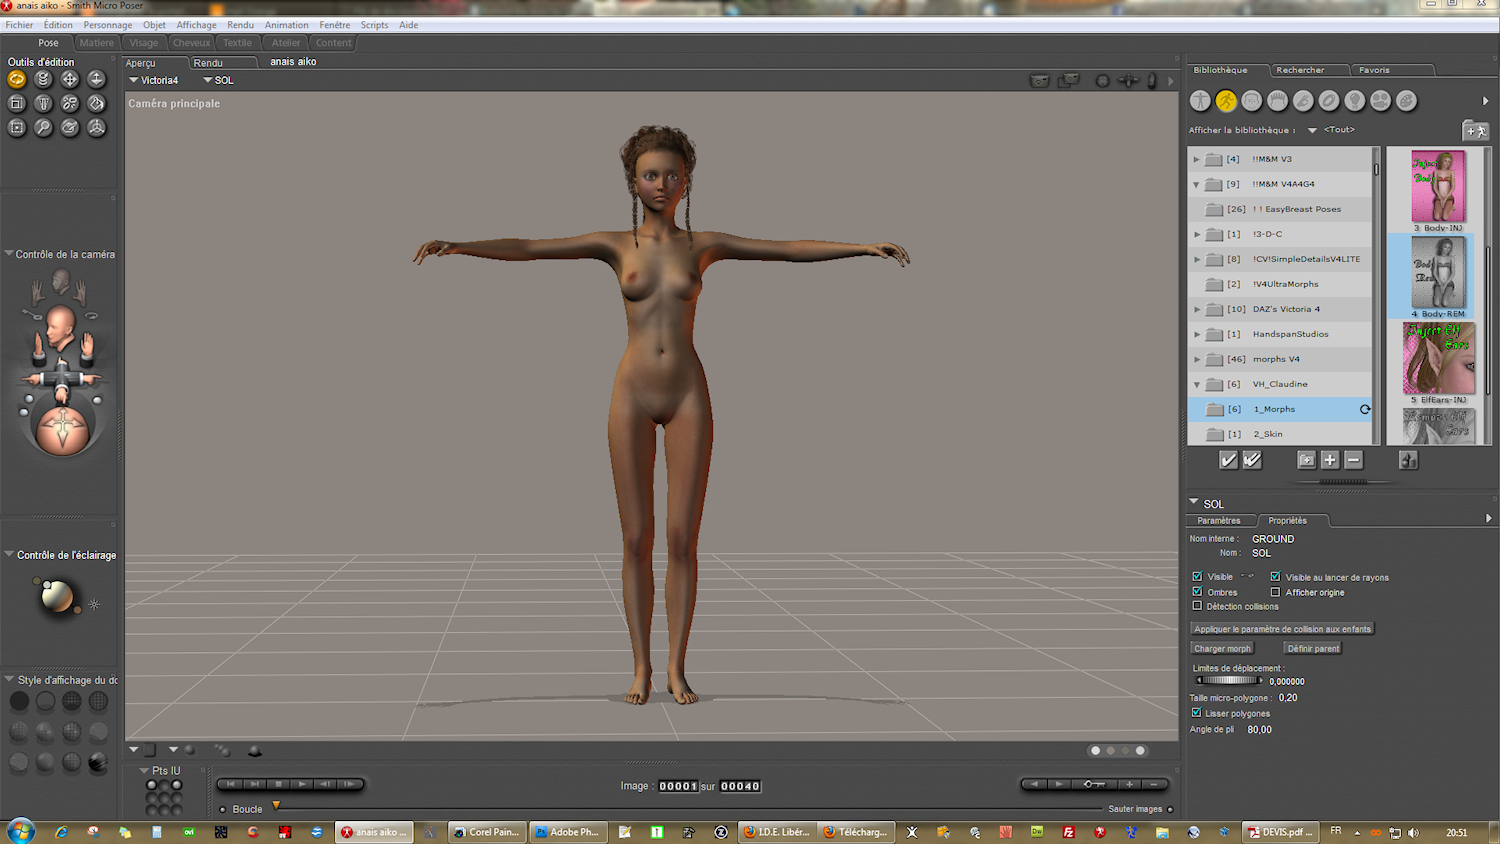
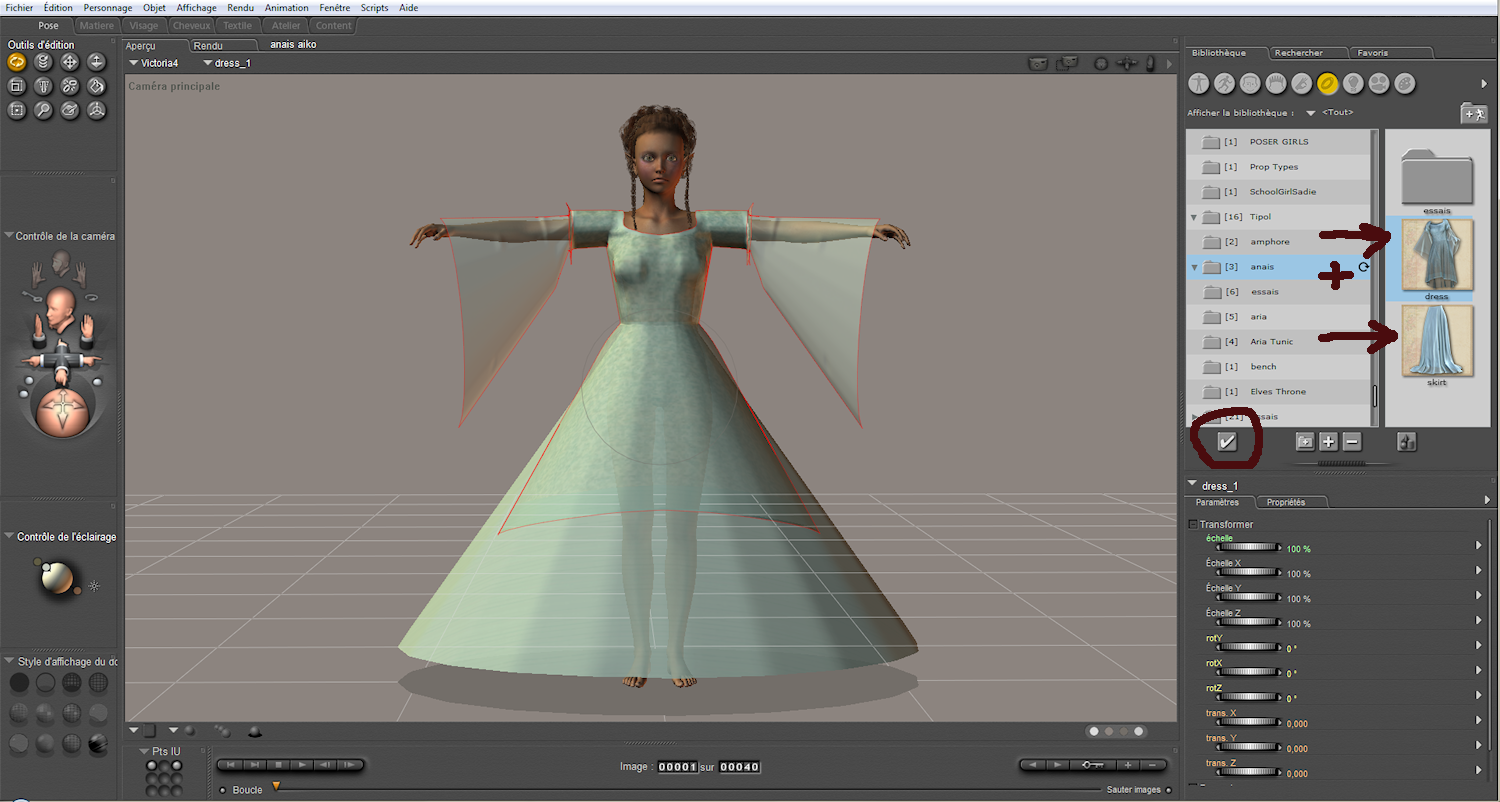
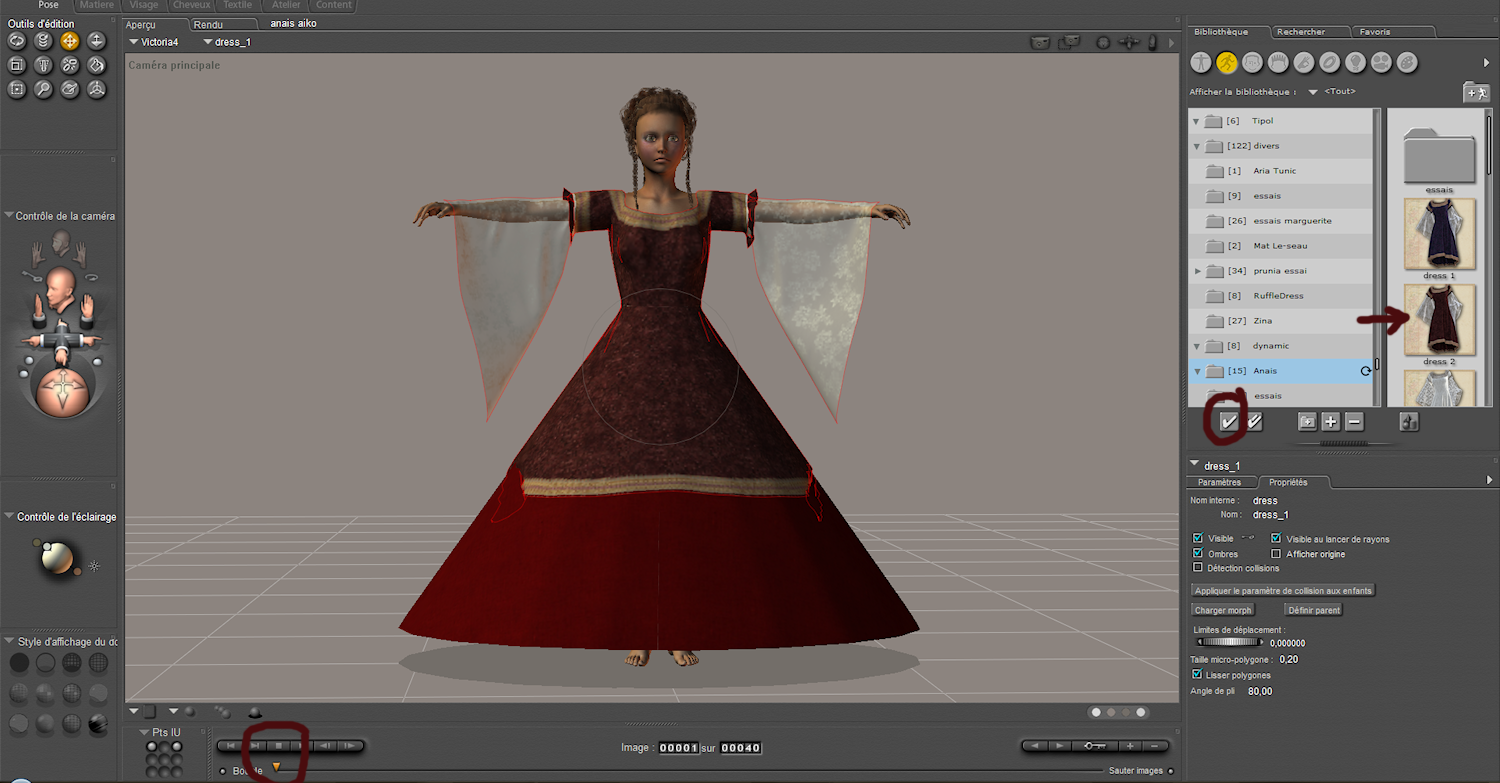
First, load your character. Add (if you want) a morph, skin texture and hair. Important: leave character in zero pose.
Load dynamic clothes.
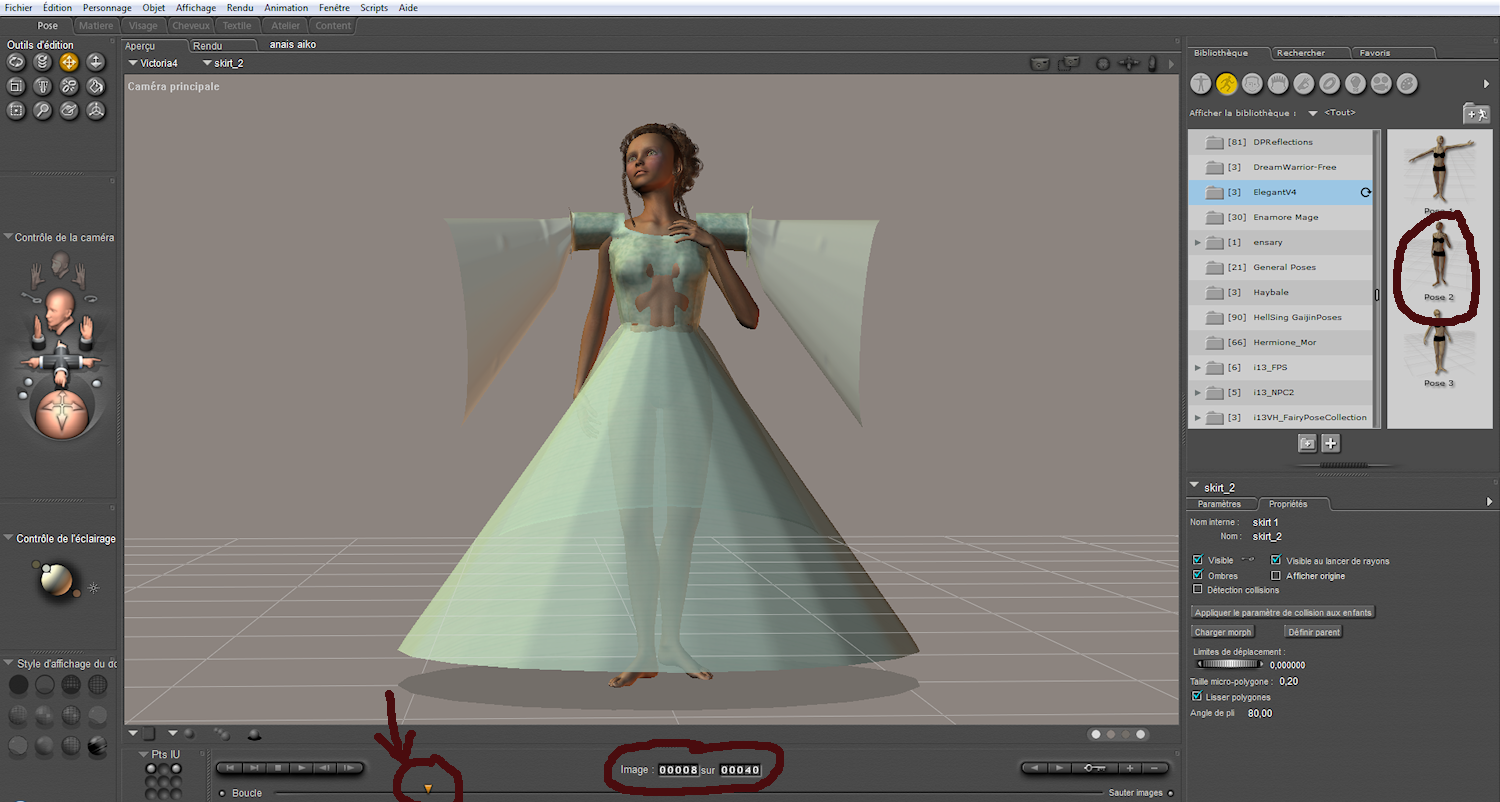
Using the marker (yellow triangle) scroll over the frame 8 and apply the pose of your choice.
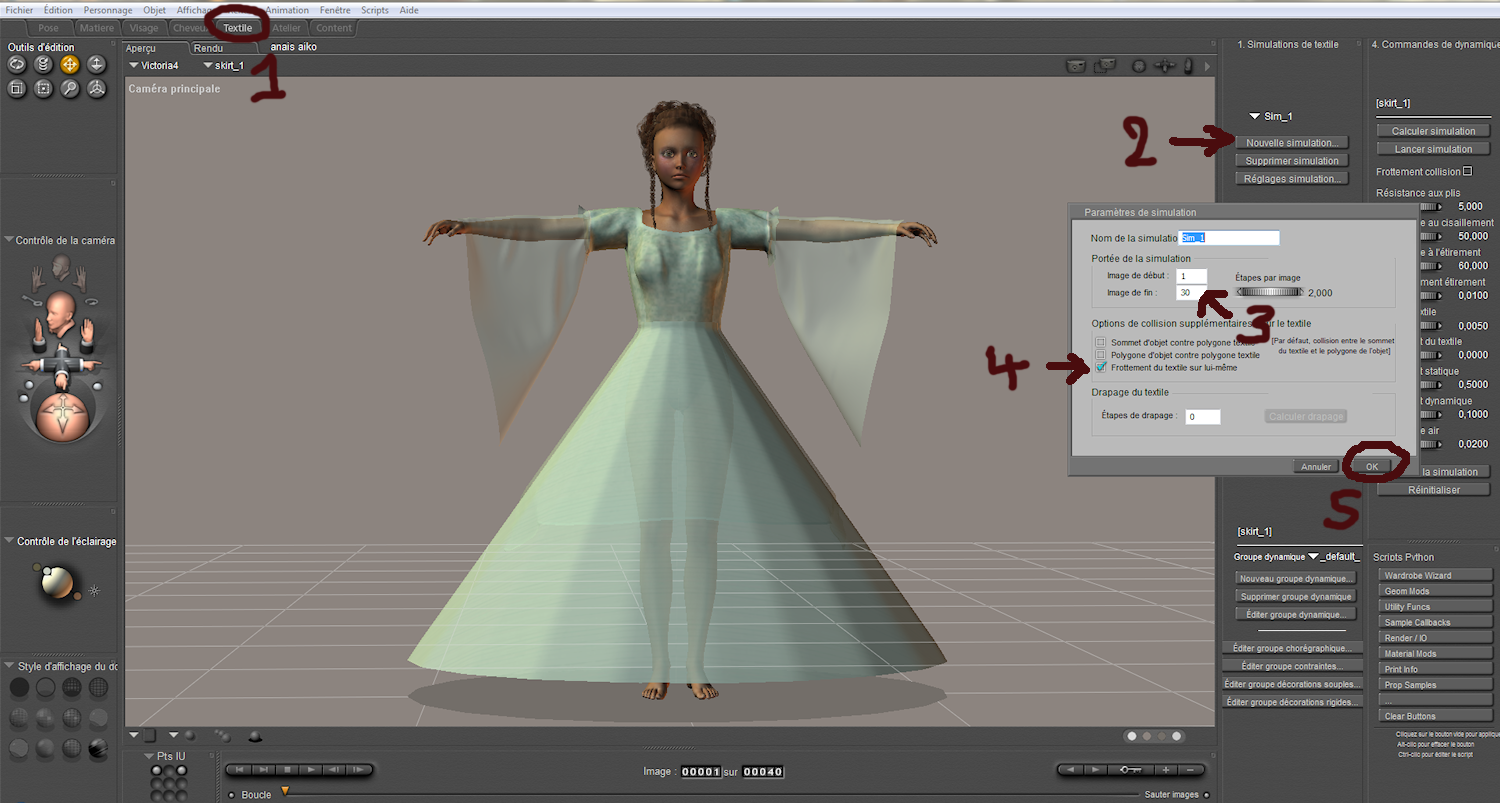
Go into textile room. Click on "New Simulation" and in the open window
apply the settings shown on the screenshot, click "ok".
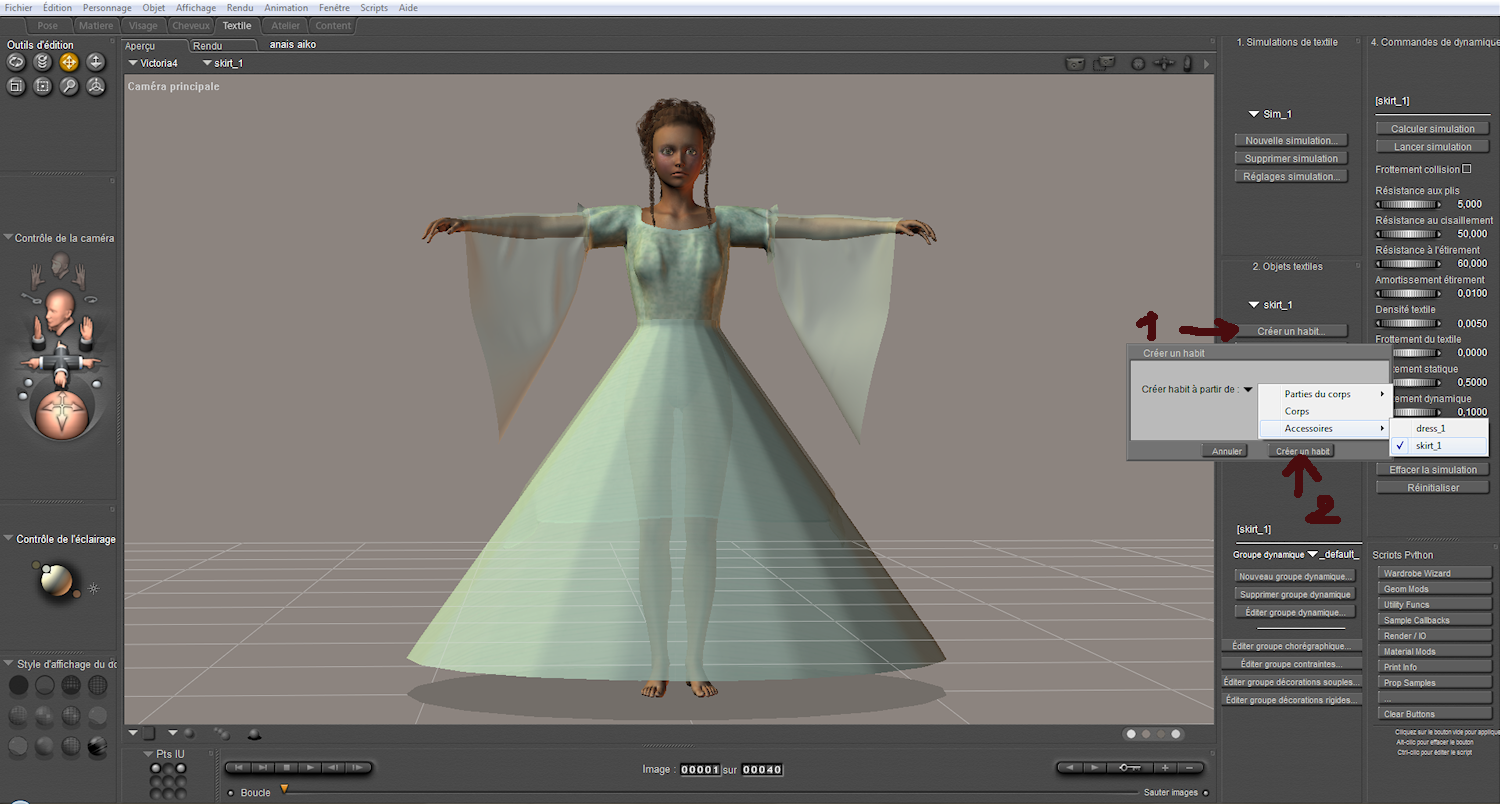
Select the piece of clothing to drape. To do this open window by clicking on "clothify", check the piece of clothing you want to drape and confirm by clicking on "clothify" in the window open
Warning : Always drape clothes one by one, the more under firts, finishing with the most up.
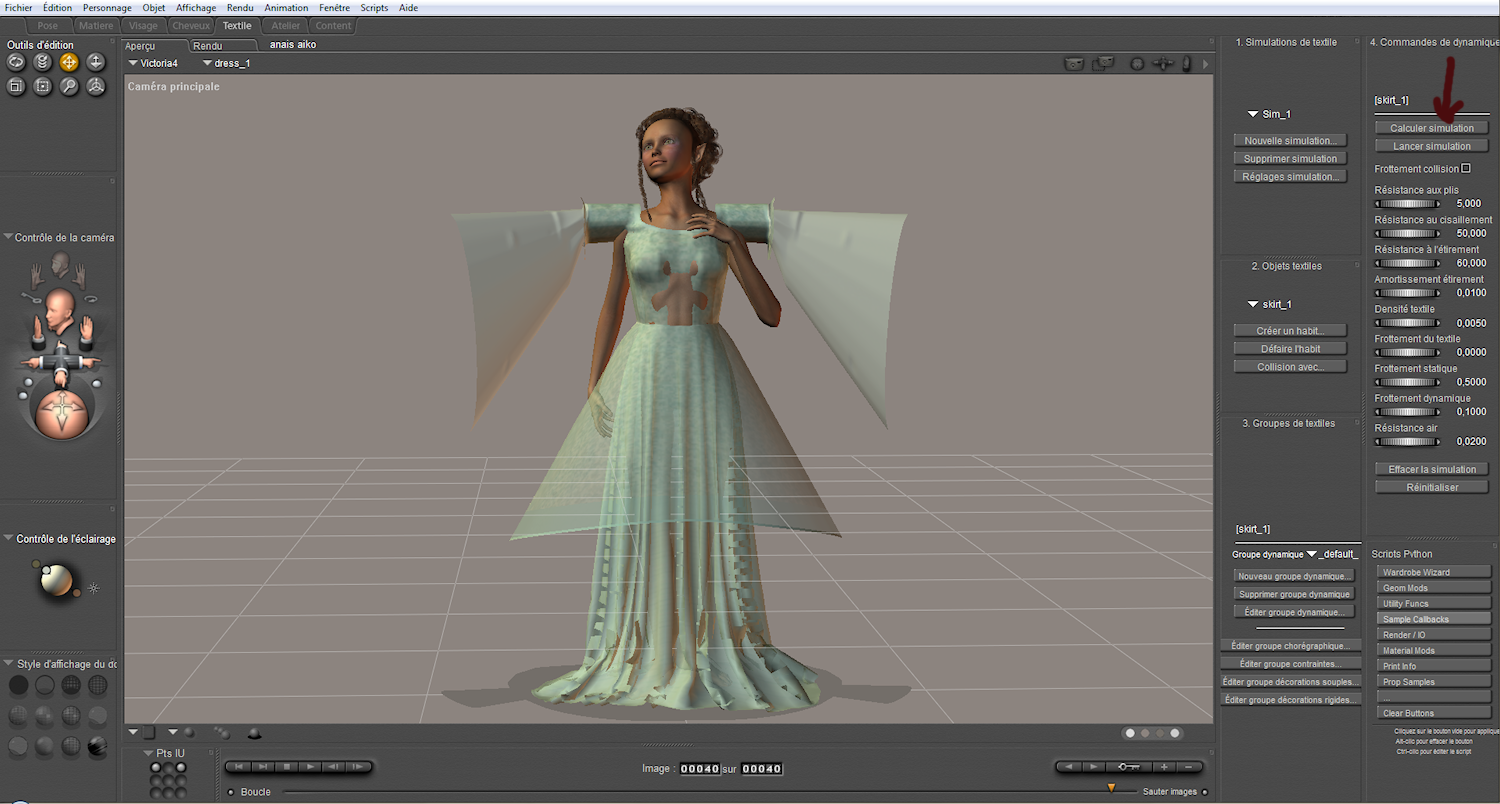
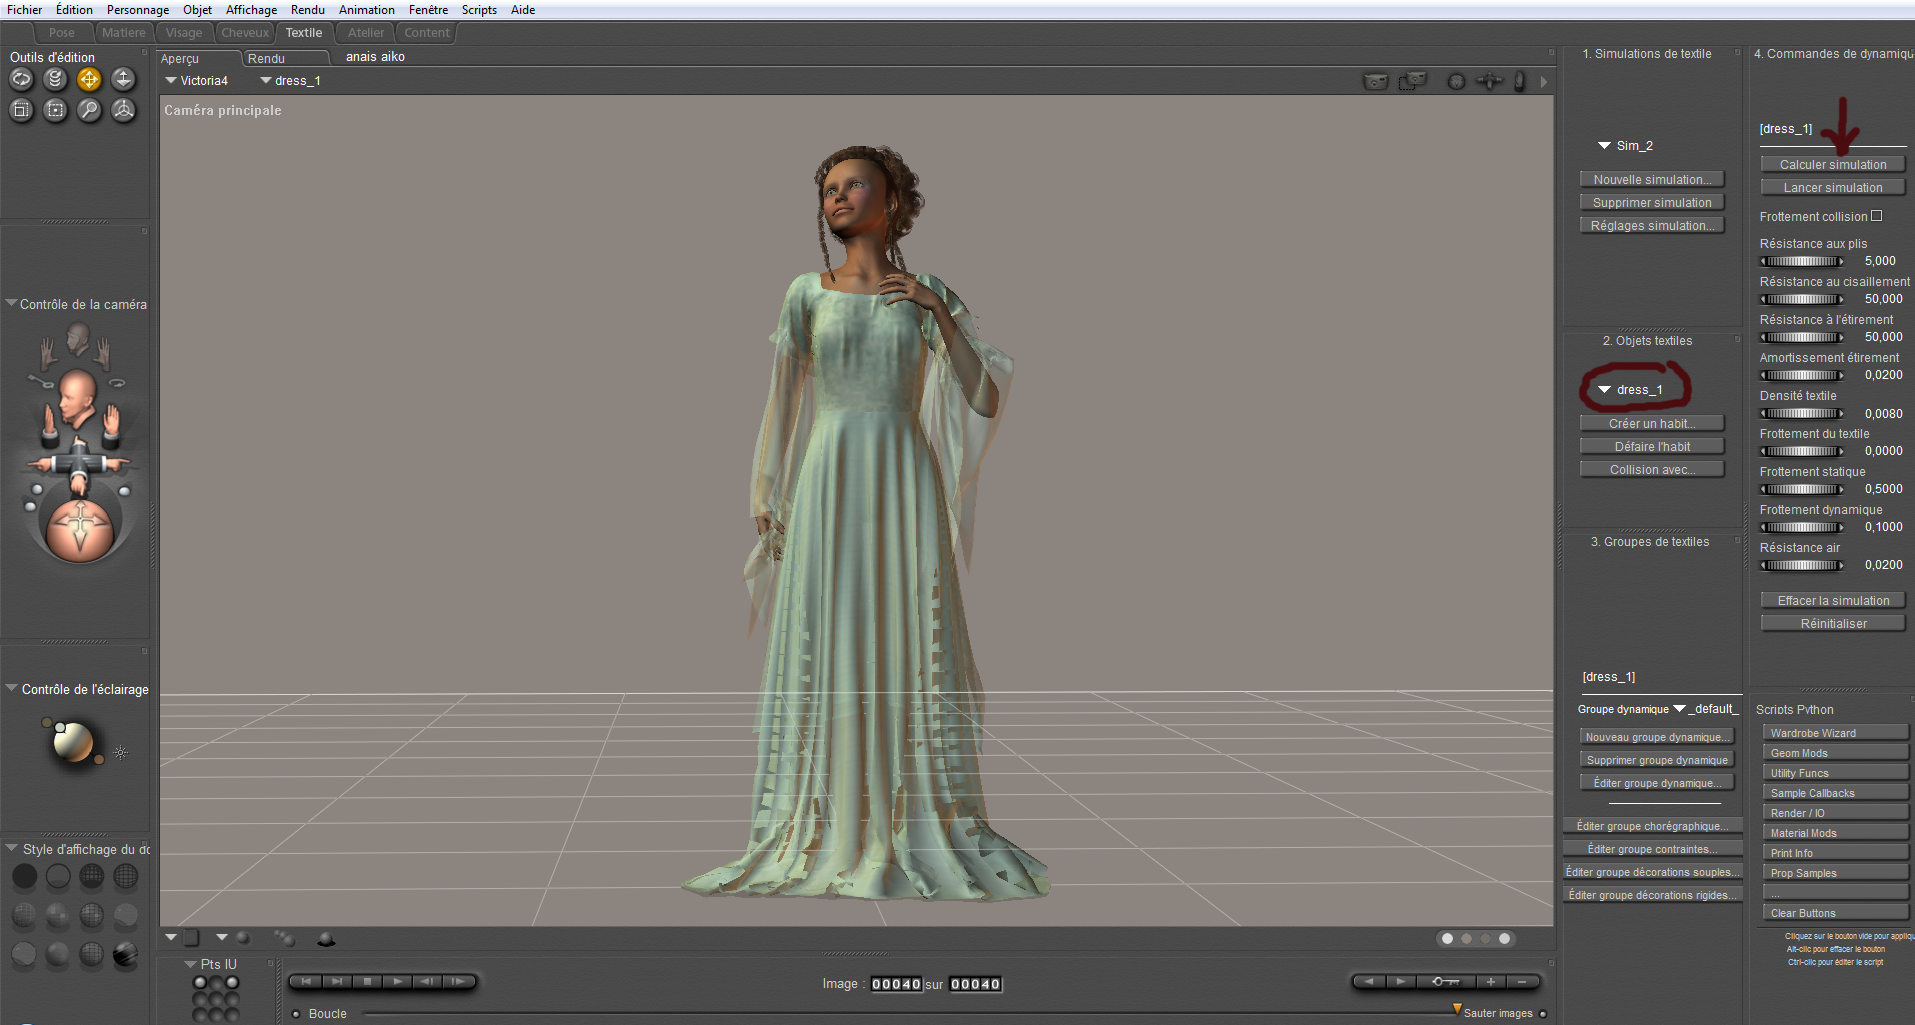
You can now click on "calculate simulation" and watch your piece of clothing draping naturally on your character.
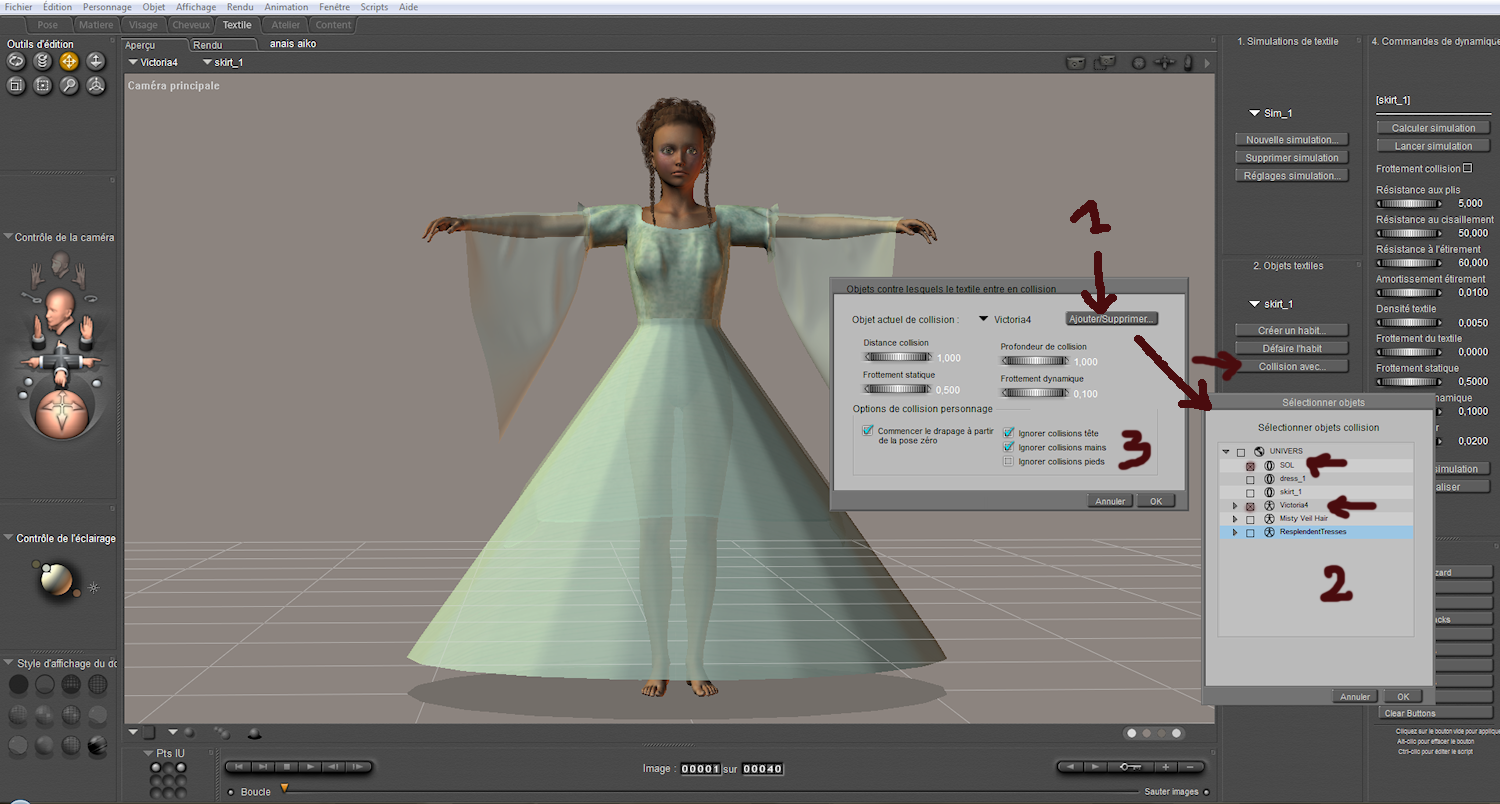
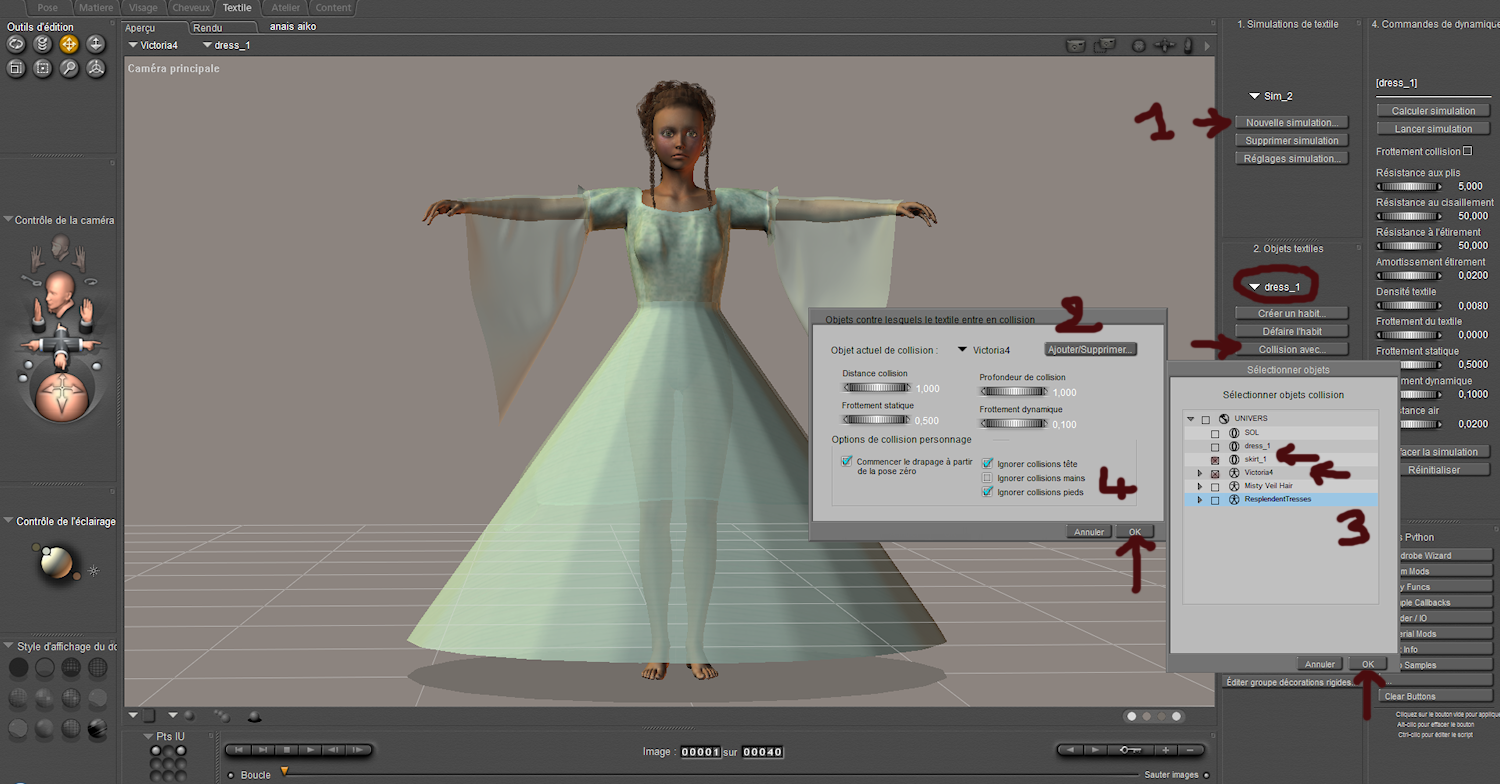
Do the same with the 2nd piece of clothing to be positioned on the first. To do it in the parameters of collision, in addition to the character, select the first clothing. The sleeves of the dress that come into collision with the hands have been unchecked.
Click on "calculate-simulation" to make draping.
To change the texture of clothes, back in pose" in workspace. Reposition the marker (yellow triangle) on the first frame of animation and apply the texture as usual. Reposition the marker on the last frame to find your poses and clothes draped
Warning, when you open a scene containing a dynamic clothing, the scene comes to the first frame, simply push the marker to the last frame to find the cloth draped.
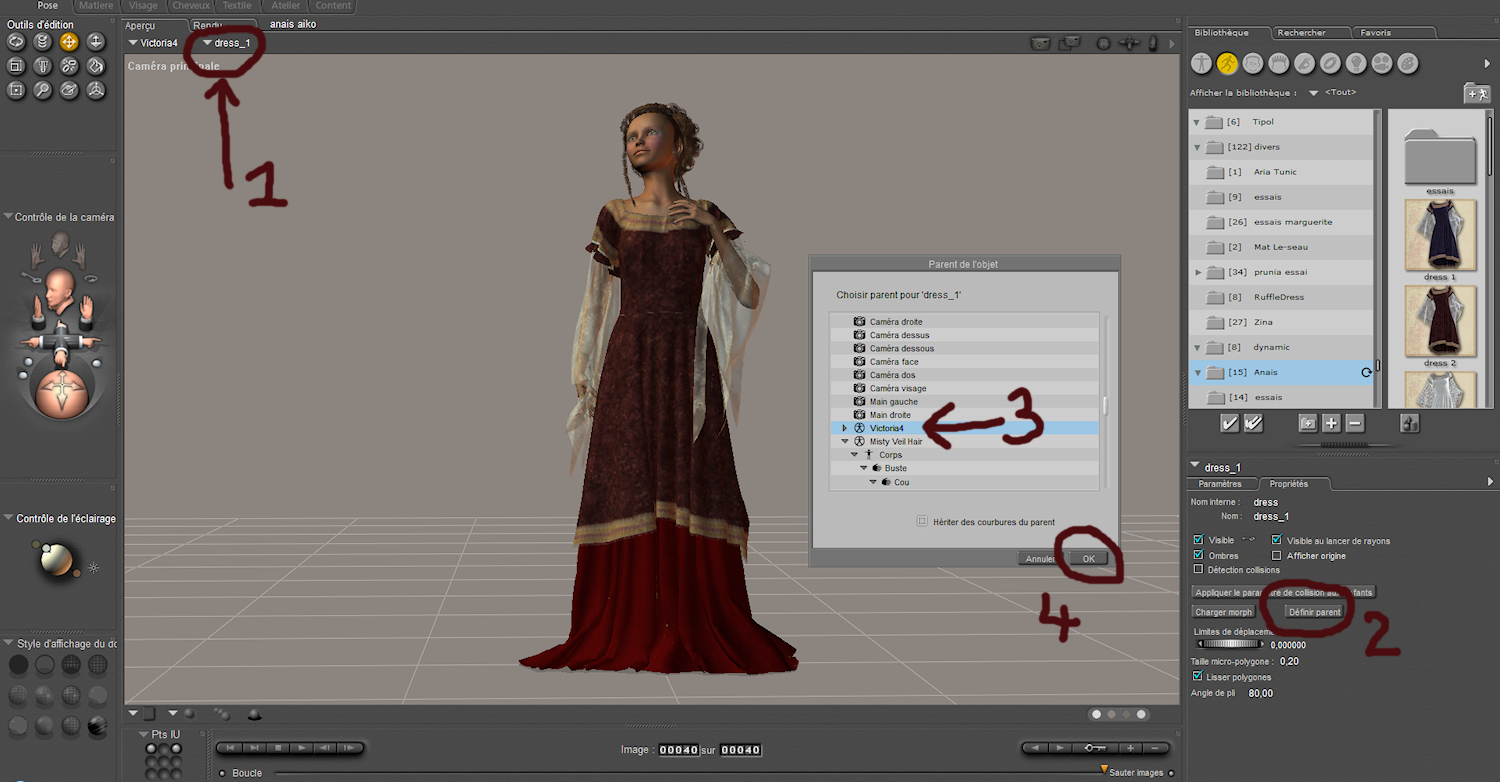
Select the piece of clothing to parents, click on "Set parent", select the character in the window that open and click "OK"
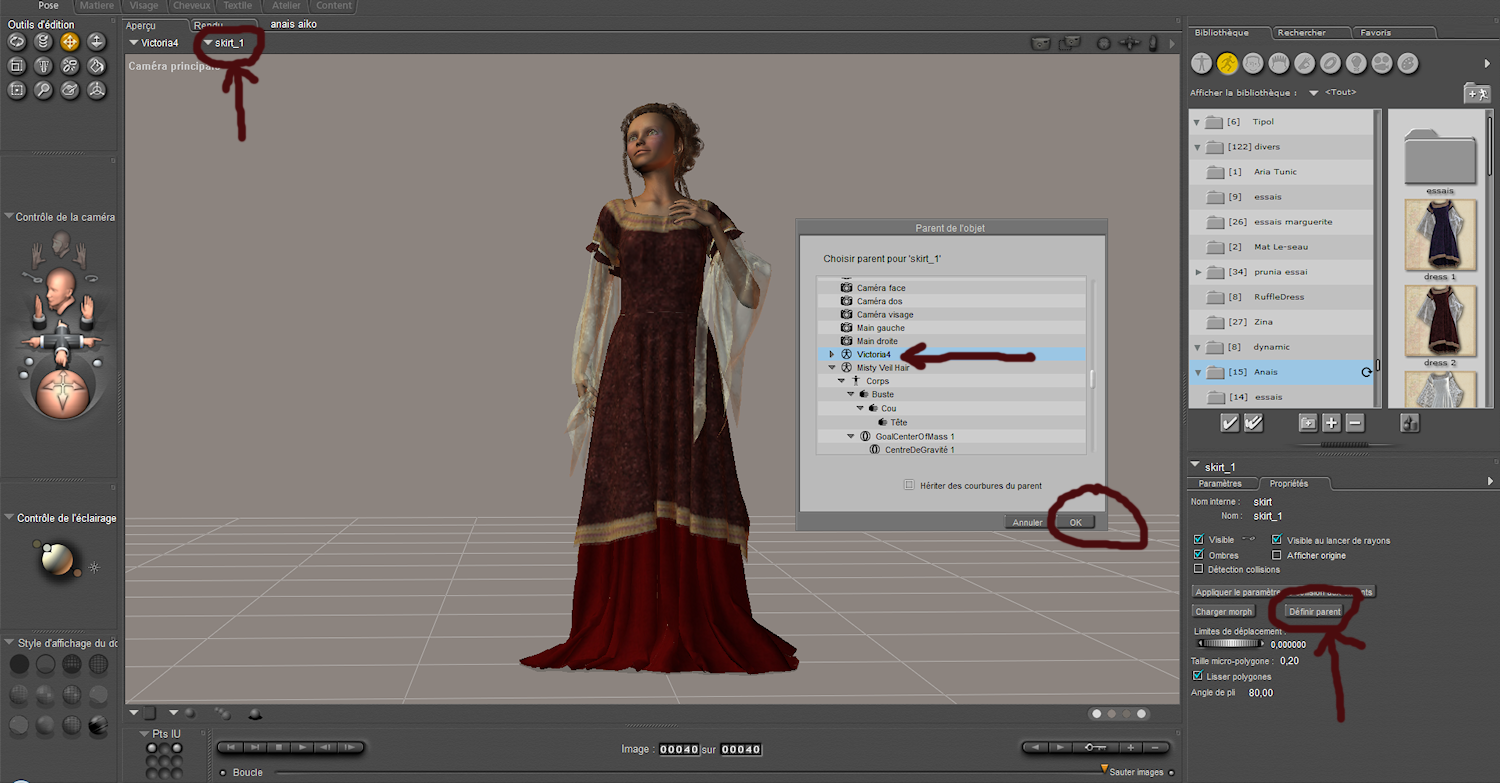
Do the same with the 2nd clothing.
You can now position the whole character-clothes where you want in the scene after having previously selected the character of course.
Have fun!

